Monday 20 June 2016

Monster Hugs 2 | Lawn Fawn


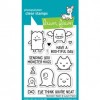
Hello there, well that weekend went so quick, the weeks are passing by so quickly at the moment aren't they? Well I decided to create a card for little boy I know who turns three in August, I thought these cute monsters will suit him to the tee..


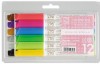
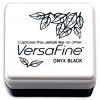
Cut down a piece of Neenah card slightly smaller than the card blank to create a panel, then I stamped the monster with wings first using versafine onyx black ink and my homemade stamping tool, created a mask by stamping the same image onto a piece of sticky note and cut this out with scissors and stamped the other images around the first image, creating a mask for each monster. Stamped the sentiment below from the Lawn Fawn Monster Mash using the same onyx black ink. 


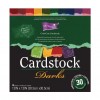
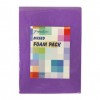
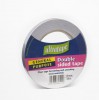
Coloured in the images with WHSmith artist quality watercolour pencils, adding a little clear wink of stella to each image when finish colouring. Cut a piece of fun foam to fit the panel, adhere this to the back of panel with double tape, adhere a piece of the cordinations card to the A2 (US size) card blank with double sided tape. Then adhere the panel to the card with double sided tape. Finished off with white tonic nuvo drops.


Well I so hope the little boy loves this card as I've loved creating it especially for him. Enjoy the rest of day wherever you are in the world.


(Click images below for the supplies I've used, please note I do not use affiliate links) 


Monday 13 June 2016

For a Guy | Silhouette Cameo


Hello there, dearly hope you're all had lovely weekend? Well today's card I've designed for a male or boy, but didn't want to do a stereotypical male or boy card, so I opted for a rainbow theme to shake things up a bit and I don't know about you, but I think it works quite well.  


Created a stitched panel within the silhouette cameo software and inside that panel I also added the letters "Make a Wish" inside the stitched panel and cut out using the silhouette cameo, then I cut out again the letters from "Make a Wish" in different colours of the cordinations coloured card to create a rainbow. Then I applied strips of double sided tape to the near of the cut out panel so I could inlay the coloured letters into the panel.   


Placed a piece of fun foam to the the back of the panel with double sided tape and then placed the panel to the A2 (US size) card blank with double sided tape. I then adhered a few clear 3D droplets and a tiny amount of wink of stella to some of the letters to had something that bit different. 


I hope you like this design as much as I do, as rainbow colours always create a happy feel good factor to any design. Do you love the rainbow theme? Enjoy the rest of your day.


This will be entered to these challenges

Simon Says Stamp Wednesday Challenge Blog


(Click on the links below to see where I purchase the supplies used, I not currently use affiliate links)